
GA4 setup for Shopify app listings
Checklist to set up GA4 for Shopify app listings: dedicated properties, Measurement Protocol installs, and consistent UTMs.
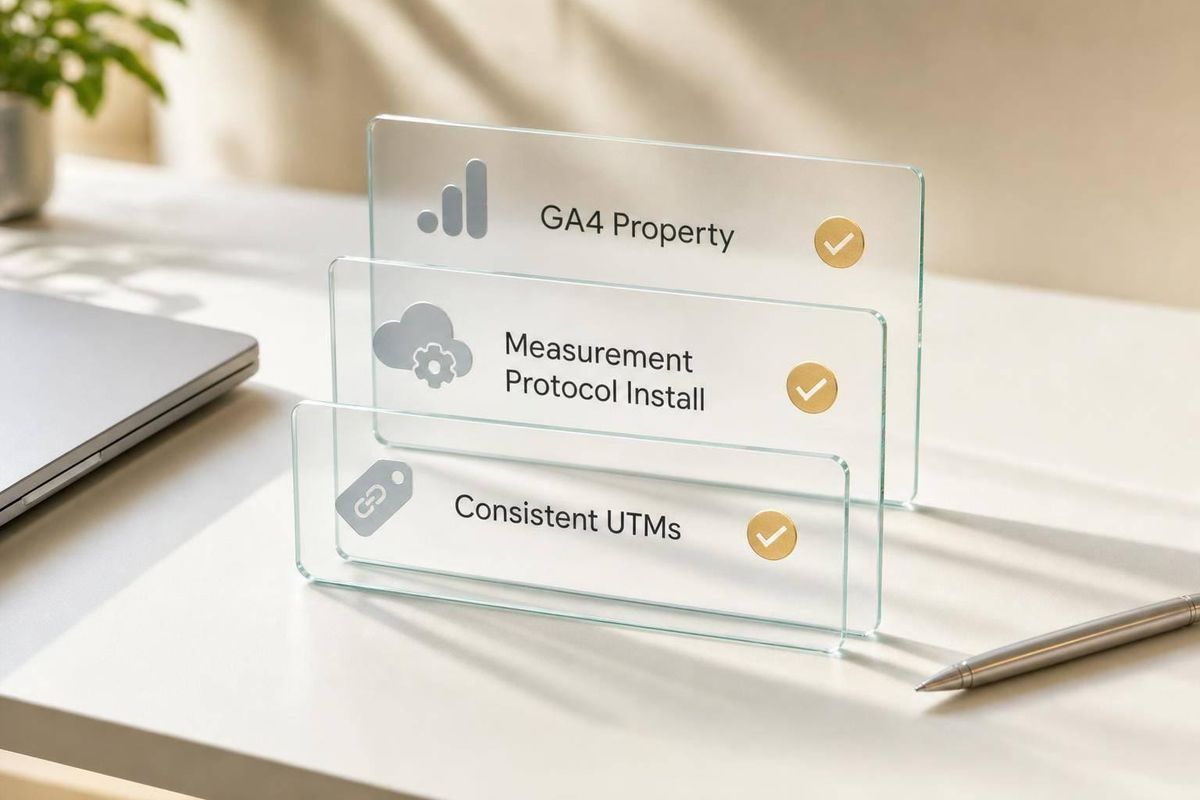
If I want to know which clicks lead to installs, I need more than Shopify’s default reports. This setup comes down to 5 things: one GA4 property per app listing, one web stream, a Measurement ID in Shopify, server-side install events through Measurement Protocol, and clean UTMs.
Here’s the short version:
- I use 1 GA4 property for 1 Shopify app listing
- I add 1 web data stream and set timezone, currency, and date format before launch
- I place the Measurement ID in the Shopify Partner Dashboard
- I create a Measurement Protocol API secret so installs can show in GA4
- I keep naming in lowercase snake_case for UTMs and events
- I check whether Shopify redirects are stealing attribution
- I validate page views, sessions, and installs against Shopify Partners data
A lot of tracking issues come from a small set of mistakes: mixed properties, bad UTMs, referral problems, or duplicate install events. If I fix those early, I can see whether traffic from App Store search, category pages, Google, email, or paid campaigns is turning into installs.
Bottom line: this checklist is about clean setup, clean naming, and clean validation so GA4 can show where installs come from instead of just counting visits.
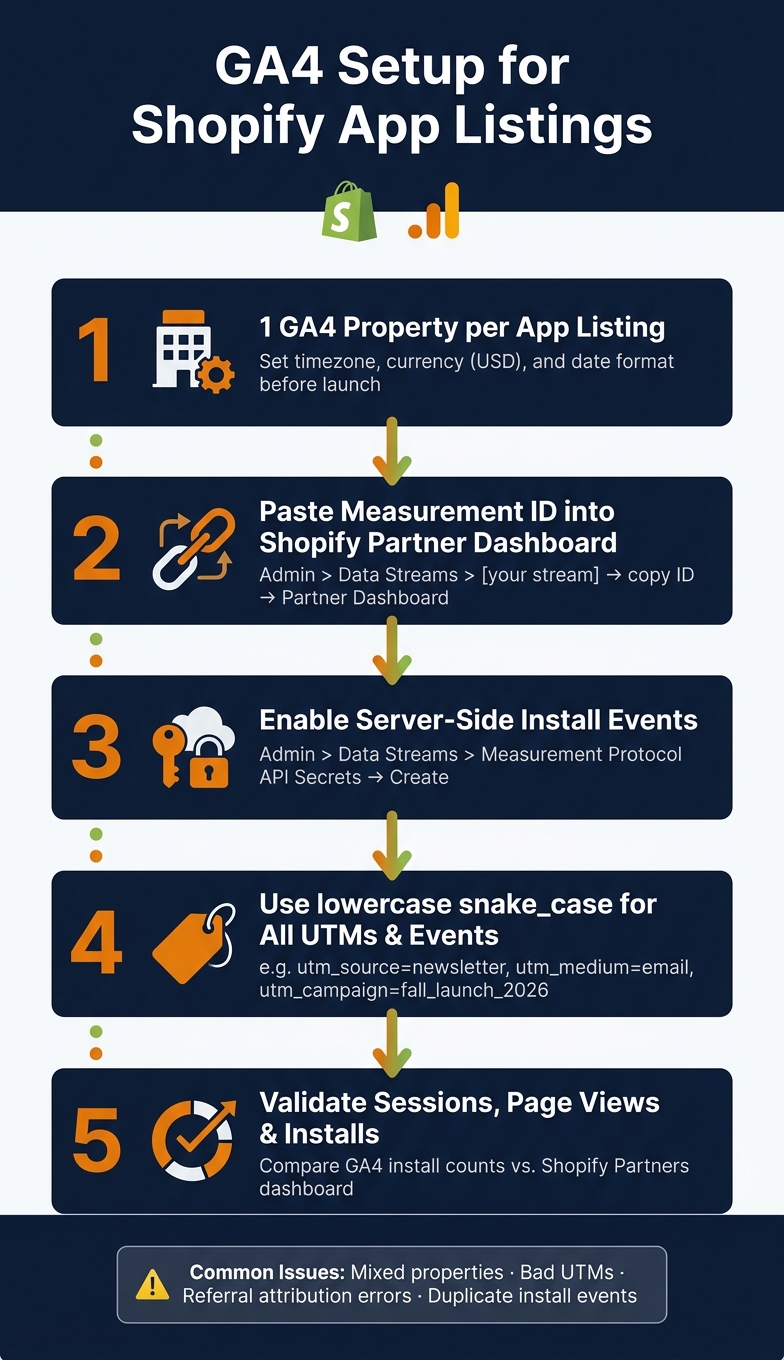
GA4 Setup for Shopify App Listings: 5-Step Checklist
1. GA4 property structure checklist
Two choices matter most here: how many properties you set up and which settings you lock before you connect anything. Get this part right, and Shopify app listing traffic stays separate from day one.
Create one GA4 property per Shopify app listing
Use one dedicated GA4 property for each Shopify app listing. That keeps listing sessions, install events, and campaign traffic inside one clean data set.
Put simply, one listing should map to one property. That way, sessions, installs, and campaigns all live in the same reporting set.
Don’t group multiple apps into a single property, even if you compare Shopify app optimization tools to manage them.
Add one web data stream and set timezone and currency
Inside that property, create one web data stream for listing traffic, then copy the Measurement ID.
Before you connect the stream, lock in these settings:
| Setting | Recommended value |
|---|---|
| Timezone | Your U.S. business timezone (for example, Eastern, Central, or Pacific) |
| Currency | USD ($) |
| Date format | mm/dd/yyyy |
Set these values before tracking begins.
Next, add the Measurement ID to the Shopify app listing.
sbb-itb-ce93587
2. Shopify app listing tracking setup checklist
Next, connect GA4 to the listing and separate its traffic from everything else. This part covers three jobs: add the Measurement ID, create the API secret, and filter listing traffic.
Add the GA4 Measurement ID to the Shopify app listing
Your Measurement ID is in GA4 under Admin > Data Streams > [your stream]. Copy it exactly.
Then open your Shopify Partner Dashboard and paste that ID into the matching field for the app listing. Double-check that the ID goes to the right listing. It sounds obvious, but this is the kind of small mix-up that can throw off reporting later.
Create a Measurement Protocol API secret for install events
Page views are useful, but installs are what you care about. If you want install activity to show up as events in GA4, you need a Measurement Protocol API secret. This lets Shopify send server-side install events straight to your GA4 property.
Create the secret in GA4 under Admin > Data Streams > [your stream] > Measurement Protocol API secrets. Click Create and copy the value. After that, paste it into the matching field in your Shopify Partner Dashboard next to your Measurement ID.
Keep listing traffic separate from unrelated site traffic
Your Shopify app listing sits on apps.shopify.com. Your marketing site, docs, and blog sit on your own domain. If you mix those visits together, the data gets messy fast.
Use the Hostname dimension in Explorations to isolate apps.shopify.com. That filters out traffic from your own site, so you're looking at listing visits only.
Next, standardize UTMs, event names, and referral handling before traffic starts to grow.
3. UTM parameters, event naming, and referral handling checklist
With tracking set up, the next step is simple: label every listing campaign the same way.
Use consistent UTM parameters for every listing campaign
Every paid ad, partner email, or social post that links to your app listing should follow the same UTM format. Don’t let one team use paid_social while another uses social-paid and a third uses Social. That kind of drift makes reporting messy fast.
Use one documented pattern for source, medium, and campaign across paid, email, partner, and social links. For example: utm_source=newsletter, utm_medium=email, utm_campaign=fall_launch_2026.
Use lowercase snake_case event names and stable parameters
Once your UTMs are locked, do the same for event names.
GA4 event names are case-sensitive, so keep custom event names in lowercase snake_case. Also avoid reserved prefixes such as ga_, google_, or firebase_.
A good rule here: use one steady event name per action. If something changes, put that change in parameters instead of making a new event name every time. It keeps reports cleaner and saves you from headaches later.
Check referral behavior before excluding any sources
After naming is fixed, check referral behavior before validation. This part matters more than it seems.
Shopify redirects can shift attribution. When a merchant clicks from your app listing into Shopify admin to complete an install, GA4 may credit the install to shopify.com or admin.shopify.com instead of the original source. Before excluding any referral source, inspect actual traffic and confirm that apps.shopify.com, App Store search, and category-browse traffic still attribute correctly.
Then verify that the data lands in GA4 the way you expect.
4. Validation and data quality checklist
With your UTMs cleaned up and referral behavior checked, the next step is simple: make sure the data is showing up the way it should. If the setup is off, every report after that can point you in the wrong direction.
Confirm listing sessions and page views appear in GA4
As soon as you add the Measurement ID to your Shopify app listing, open the GA4 Realtime report and visit your listing page. You should see a page_view event show up soon after.
If nothing appears after a few minutes, go back and check that the Measurement ID was entered and saved in the right Shopify listing field.
Once that passes, head to the Traffic acquisition report. Check that traffic is falling into the sources you expect, like:
- Shopify App Store search
- Category browse
- Google organic
- Direct
If you see too much Direct or Unassigned traffic, that usually means your UTMs are missing or your referral setup needs work. If page views are showing but installs are not, the next place to check is event validation.
Verify install events, attribution, and deduplication
For install events sent through the Measurement Protocol, run a test install if you can. Then check the standard Events report after GA4 has had time to process the data.
When the event appears in GA4, confirm that the source, medium, and campaign parameters match the campaign source you expected. Then compare GA4 install counts with the Shopify Partners dashboard.
This cross-check helps you spot three common problems:
- Missing conversions
- Duplicate conversions
- Misattributed conversions
If the numbers don’t line up, the usual cause is duplicate conversions, missing events, or attribution mistakes.
Final checklist summary and next reporting step
Keep the order fixed: create the GA4 property and web data stream → add the Measurement ID and Measurement Protocol API secret → standardize UTMs and event names → review referral behavior → validate sessions, page views, and install events against Shopify Partners data.
For reporting over time, use one view that pulls in both traffic and install data. AppJubilee can combine GA4 and Shopify Partners data for listing reporting.
FAQs
Why should I use one GA4 property per app listing?
Using one GA4 property per app listing keeps your traffic, install intent, and conversion data clean. Each property maps to one app, so your reporting stays tied to that listing instead of getting mixed together.
Since AppJubilee connects to GA4 for each app, separate properties make tracking much simpler. You can see performance, keyword impact, and listing changes for each app on their own, without cross-contamination. That gives you a much clearer view of what’s actually driving installs.
What causes installs to show as Direct or shopify.com?
Installs often show up as Direct or shopify.com in Google Analytics 4 when referral data gets dropped somewhere along the path.
That usually means the Shopify App Store, your app listing, or the install flow isn't sending UTM parameters or referrer data in a way GA4 can use. It’s worth double-checking that your GA4 measurement ID is set up correctly and that your UTM rules stay consistent from start to finish.
How do I check for duplicate install events?
Compare your GA4 install event data with the install counts in your Shopify Partner Dashboard. GA4 is useful for traffic and engagement data, while the Partner Dashboard is the source of truth for actual installs and uninstalls.
If you notice a meaningful gap between the two, check your GA4 event naming and trigger logic. The goal is simple: make sure each install gets recorded once, not multiple times.
If you use AppJubilee, you can also line up both datasets to spot mismatches more easily.