
How to Track App Listing Traffic in GA4
Set up GA4 for Shopify app listings—add Measurement ID and API secret, enforce UTMs, track install events, and create channel groups.
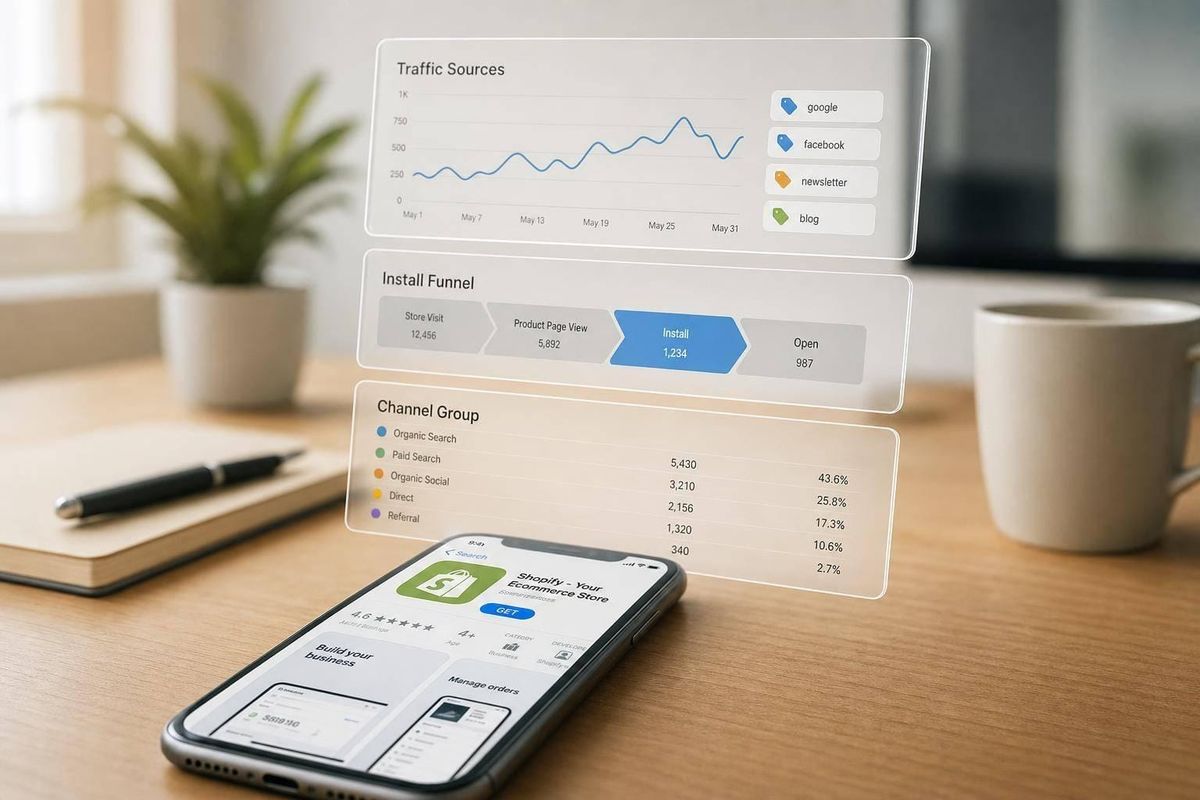
If your GA4 setup is clean, you can answer three core questions fast: who visited your app listing, where they came from, and whether they clicked to install. Without that setup, a lot of traffic gets dumped into Direct or Unassigned, which makes channel reporting hard to trust.
I’d boil the process down to four steps:
- Add your GA4 Measurement ID and Measurement Protocol API secret in Shopify Partners
- Use consistent UTMs on every ad, email, and partner link
- Track install-intent events like
add_app_clickand backend install events - Build custom channel groups so search, paid, partner, and direct traffic are easy to compare Shopify app optimization tools
A few details matter more than most:
- GA4 is case-sensitive, so
Facebookandfacebookwill split into separate rows - Shopify App Store traffic may include parameters like
surface_typeandsurface_detail - GA4 standard properties allow up to 50 event-scoped custom dimensions
- A spike in Direct / (none) often means missing UTMs or stripped referrer data, not typed-in traffic
If I were setting this up today, on August 18, 2026, I’d focus less on raw sessions and more on install rate by source. That’s usually the difference between busy reporting and useful reporting.
This article shows how to set up GA4 for a Shopify app listing, clean up attribution, map install events, and read the right GA4 reports without overcomplicating the process.
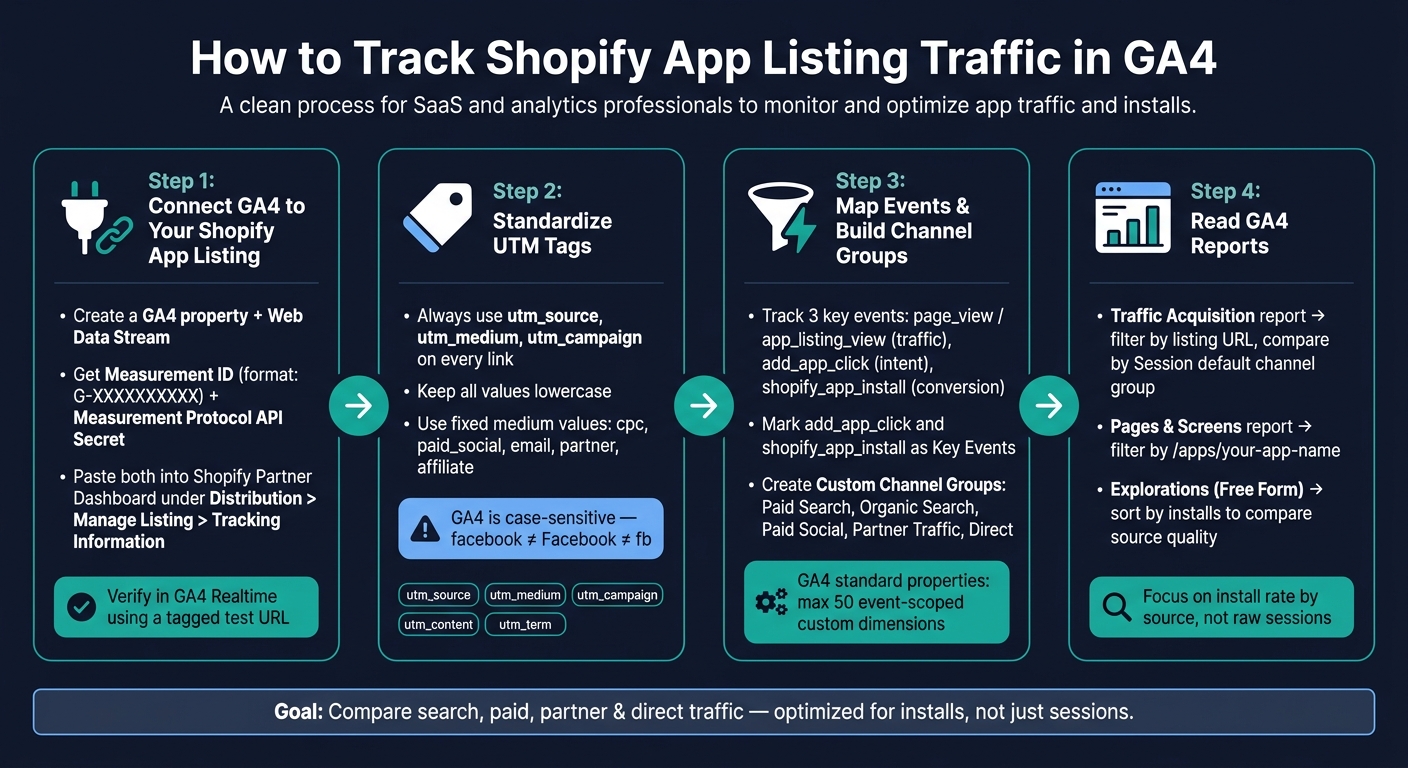
How to Set Up GA4 for Shopify App Listing Tracking (4-Step Process)
Step 1: Connect GA4 to Your Shopify App Listing
To track a Shopify app listing in GA4, you need two pieces of information: a Measurement ID and a Measurement Protocol API secret. The Measurement ID tracks browser activity. The API secret sends install events to that same GA4 property. Both come from GA4, and both need to be added in the Shopify Partner Dashboard. Put them in one internal tracker so your team can find them fast.
Create the GA4 Property, Web Stream, and Tracking Credentials
Start in GA4 Admin and create a separate property for your app listing. Don’t reuse a property that belongs to your marketing site or another product. It sounds minor, but mixing data here can turn reporting into a mess.
Once the property is set up, go to Data Streams → Add stream → Web. Enter your Shopify App Store listing URL, such as https://apps.shopify.com/your-app-slug, as the website URL. Name the stream something clear, like Shopify App Listing – Production. Also set the property time zone and currency to match your reporting setup.
After that, open Web stream details. You’ll see the Measurement ID in the top-right corner, in the format G-XXXXXXXXXX. Then scroll to Measurement Protocol API secrets, click Create, give the secret a clear label like Shopify Partners – Install Events, and copy both values into your internal tracker.
Add the Measurement ID and API Secret in Shopify Partners
Now head to the Shopify Partner Dashboard. Open your app, then go to Distribution → Manage listing. In the listing editor, find Tracking information.
Paste:
- Your GA4 Measurement ID into the Measurement ID field
- Your API secret into the API secret field
Save the listing after adding both values.
To check that everything works, open GA4 → Realtime in a separate incognito window and visit your app listing using a tagged test URL, such as ?utm_source=test&utm_medium=ga4_setup&utm_campaign=listing_validation. Within a few minutes, you should see an active user and a page_view event.
Then run a test install through a development store. After that, check Realtime again and confirm that your expected install event shows up.
Capture Search and Surface Parameters
The Shopify App Store may add URL parameters like surface_type and surface_detail to app listing URLs. These can tell you where the listing visit came from, such as search, category browse, or recommendation placements.
If you want that data in GA4, map those parameters to event parameters like listing_search_term or listing_surface. Then register them as event-scoped custom dimensions in GA4 Admin.
That gives you a cleaner way to break down listing traffic and install behavior by surface in Explorations, which sets up the source-level analysis covered later in Step 4. Just make sure you keep only non-PII values.
Once tracking is live, standardize your UTMs so search, ads, and partner traffic stay attributable.
sbb-itb-ce93587
Step 2: Standardize UTM Tags and Source Checks
Once tracking is live, the next job is attribution quality. GA4 can separate app listing traffic cleanly only if every external link uses consistent UTMs. If that falls apart, paid campaigns can slip into "Unassigned", and "Direct" can swell with visits you can't account for.
Use a Simple UTM Naming System for Ads, Partners, and Email
Use one UTM format for every app listing link across ads, partner placements, and email. Start with utm_source, utm_medium, and utm_campaign. Add utm_content and utm_term only when you need more detail.
One thing trips teams up all the time: GA4 is case-sensitive. That means Facebook, facebook, and fb show up as separate rows. Same traffic source in plain English, three different entries in GA4.
| Parameter | Purpose | Example values |
|---|---|---|
utm_source |
Platform or site sending traffic | google, meta, linkedin, partner_agencyxyz, newsletter |
utm_medium |
Channel type, matched to your channel rules | cpc, paid_social, email, partner, affiliate |
utm_campaign |
The specific initiative | install_newstores_aug2026, co_marketing_webinar_sep2026 |
utm_content |
Creative or placement variant | video1_feed, newsletter_primary_cta, sidebar_link |
utm_term |
Keyword or audience detail | shopify_inventory_app, branded_search |
Keep everything lowercase. Pick one separator - either underscores or hyphens - and stick with it. Don't mix them.
For utm_medium, use a fixed set of values so reports stay clean:
cpcfor paid searchpaid_socialfor paid socialemailfor emailpartneroraffiliatefor partner traffic
If you need more control, custom channel groups can sort partner programs later.
Test Tagged Links in GA4 Before Launching Campaigns
Before anything goes live, make sure GA4 reads each tagged link the way you expect. Open your UTM-tagged listing URL in an incognito browser window. Then go to GA4 → Realtime and check that source, medium, and campaign match your tags.
If the session lands in the wrong channel group, that's your clue to review the utm_medium value or your custom channel grouping rules. Write down the result and the tested URL in your campaign QA checklist before launch. It sounds basic, but this step can save a lot of cleanup later.
Check Referral and Direct Traffic for Attribution Gaps
After your tagging system is in place, check acquisition reports for gaps. A big share of Direct / (none) almost never means people are typing your app listing URL from memory. More often, one of three things happened:
- UTMs were missing
- a redirect stripped the parameters
- the click came from a place that doesn't pass referrer data
Referral traffic usually means a partner sent listing traffic without UTMs. The visits still count, but they're much harder to compare across partners.
To spot problems, go to Reports → Acquisition → Traffic acquisition, break down by Session source / medium, and look for unexpected domains, odd medium names, or too much direct / (none). Each one usually points to a missing UTM.
The fix is simple: send partners ready-to-use URLs with UTMs already attached. This ensures your traffic data aligns with your Shopify app keyword research and organic discovery efforts.
Once your UTMs are clean, map key events and channel groups so GA4 can compare source quality.
Step 3: Map Events and Build Channel Groupings
Clean UTMs help GA4 label traffic the right way. But if you want to know which sources lead to installs, you need the right events and channel groups in place.
This is where GA4 starts to separate traffic volume from install quality.
Mark the Right Events as Key Events
Track these three events:
page_vieworapp_listing_viewadd_app_click- backend install confirmation (
shopify_app_install)
Mark add_app_click and shopify_app_install as key events in Admin → Events.
Leave app_listing_view out. It’s useful for measuring traffic, but it doesn’t signal a conversion. Think of it as a top-of-funnel number, not the moment that shows buying intent.
Use Custom Dimensions Only for Fields You Will Report On
GA4 standard properties cap you at 50 event-scoped custom dimensions, so it’s smart to be selective. Register only the fields you plan to use in reports or Explorations.
For a Shopify app listing, the most useful custom dimensions are:
app_idto split data by app or environmentinstall_sourceto compare partner, paid, and organic trafficplan_typeto judge revenue quality by channel
If you’re not using a parameter in a report yet, skip it for now. You can always add it later when there’s a clear need.
Then group those events into channels that match how your team already talks about traffic.
Create Custom Channel Groups for App Listing Analysis
Create a custom channel group under Admin → Data settings → Channel groups.
| Channel group | Rule logic (simplified) | Reporting use case |
|---|---|---|
| Paid Search | medium = cpc or paid_search; source in (google, bing) |
Search ad visits and installs |
| Organic Search | medium = organic; source in (google, bing, duckduckgo) |
Search visibility impact on installs |
| Paid Social | medium in (paid_social, social_paid); source in (facebook, instagram, tiktok, linkedin) |
Social ad traffic quality vs. paid search |
| Partner Traffic | medium = referral AND source in partner list, OR campaign contains partner |
Co-marketing, agency, and affiliate performance |
| Direct | source = (direct) AND medium = (none) |
Install intent from direct or untagged visits |
Stick with the default channel group for baseline comparison. Use your custom channel group when you want reporting that fits your own model.
Once this setup is done, GA4 can show more than raw session counts. It can tell you which sources bring traffic, which ones drive engagement, and which ones lead to installs.
Step 4: Use GA4 Reports to Measure Search, Ads, Partners, and Direct Traffic
Once your events are mapped and your channel groups are set, it’s time to read the numbers. GA4 standard reports and Explorations show where app listing traffic comes from and what people do after they land on the listing.
Start with Traffic Acquisition and Pages and Screens
Go to Reports → Acquisition → Traffic acquisition and filter for the app listing landing page or listing URL. Use Session default channel group to compare Organic Search, Paid Search, Referral, and Direct traffic side by side.
If you want a closer look, switch to Session source/medium. That shows the exact sources behind each channel. Add Session campaign when you need to compare ad campaigns or partner campaigns head to head.
Then open Reports → Engagement → Pages and screens and set the primary dimension to Page path and screen class. Filter for the listing page path, such as /apps/your-app-name.
This report shows:
- Views
- Users
- Average engagement time
- Key events like
add_app_clickor an install event on the listing page
Use Explorations to Compare Traffic Source Quality
Standard reports tell you how much traffic you got. Explorations help you judge traffic quality.
Use the channel groups from Step 3 so your reporting stays consistent. Go to Explore → Free form and build a table with Session default channel group, Session source/medium, and Session campaign as row dimensions. Then add metrics such as Sessions, Engaged sessions, Engagement rate, Event count for add_app_click, and your install metric.
Sort by installs. That makes it much easier to spot which sources are driving action instead of just visits.
The table below shows which GA4 report fits each use case:
| Channel | Best GA4 report | Key dimensions |
|---|---|---|
| Organic Search | Traffic acquisition | Session default channel group, Session source/medium, Session campaign |
| Paid ads | Traffic acquisition | Session medium (cpc, paid_social), Session campaign, Session source |
| Partner referrals | Traffic acquisition | Session source, Session source platform |
| Direct | Traffic acquisition | Session default channel group (Direct), Session source/medium |
| Listing page behavior | Pages and screens | Page path and screen class, Session source/medium, Event name |
| Cross-channel comparison | Explorations (Free form) | Session default channel group, Session source/medium, Session campaign |
Here’s where this gets useful fast: a partner referral might send fewer sessions than a paid campaign, but if it produces a better install rate, it may be worth more. Explorations lets you see that in one place instead of piecing it together across reports.
Connect GA4 Insights with AppJubilee for Ongoing ASO Analysis
For ongoing ASO analysis, add keyword and ranking data to your GA4 traffic trends. This is especially useful when analyzing specific categories like product review apps to see how search visibility impacts conversion. AppJubilee adds ASO context by combining GA4 and Shopify Partners data with daily keyword tracking, ranking snapshots, and listing-change impact tracking.
Conclusion: A Clean GA4 Setup Makes App Listing Traffic Measurable
Once tracking, tagging, events, and channel groups are set up, the next step is simple: keep the data clean.
A clean GA4 setup turns app listing traffic into source-level data. With the Measurement ID, API secret, steady UTMs, key events, and custom channel groups in place, you can compare search, ads, partner, and direct traffic in one report.
That gives your team a better way to optimize for installs, not just sessions.
To keep things accurate, review the setup every quarter. Check UTMs, review referrals, and update channel groups when you add new traffic sources.
For ASO work that goes beyond traffic numbers, pair that upkeep with listing visibility data. AppJubilee adds keyword tracking, competitor alerts, ranking snapshots, and listing-change impact tracking, so you can see why traffic moved.
GA4 shows how traffic performs. AppJubilee adds keyword and listing-change context, so you can explain the shift and act on it.
FAQs
Why is my app listing traffic showing as Direct or Unassigned?
In GA4, traffic shows up as Direct or Unassigned when Google can't tell where the visit came from. That means the source, medium, or campaign data didn't come through. On Shopify app listings, this often happens when UTM parameters are missing or the referral data gets stripped along the way.
If you connect GA4 to AppJubilee, you get a clearer view of what's going on. You can line up those visits with keyword rankings and listing performance, which makes it easier to spot which sources are more likely tied to install intent and conversions.
Which GA4 events should I track for app installs?
Track unique GA4 events tied to install completions as your main conversion goal.
If your GA4 property is connected through OAuth, you can review those events alongside traffic sources like App Store search, category browse, and direct links. That makes it easier to see which keywords and campaigns lead to installs and to calculate your listing conversion rates.
How do custom channel groups improve app listing reporting?
Custom channel groups make GA4 app listing reports much easier to read. Instead of dumping traffic into broad, blurry categories, they sort visits into buckets that make sense for app marketers, like app store search, category browse, Google organic, referral or partner links, and direct.
That matters because it gives you a steadier way to tie installs and engagement back to the source.
With GA4 connected, AppJubilee pulls in those sources and shows keyword performance and installs by traffic source. In plain English: you can see which channels are helping drive rankings and which ones are turning into conversions.